How to make toys
Published :
01/06/2020 10:46:45
Categories :
Advice from psychologists on raising a child
, List of all pediatricians by city
, Video tips from pediatricians
Although we live in a time of high technology and toys that are available on the market are becoming more automated, the largest percentage of worldwide toy sales still have soft toys.
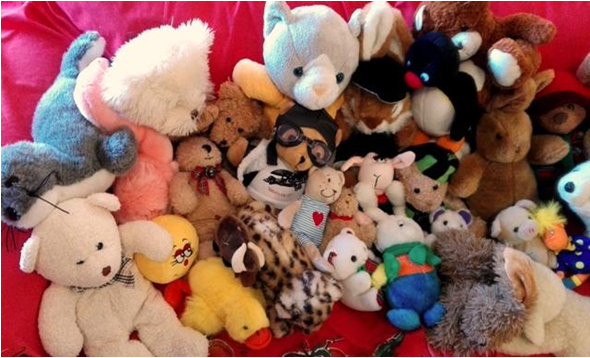
When you think about it, this is completely logical given the fact that there is no child who does not like plush toys and does not have at least one full cupboard with similar toys.
According to world statistics, about 85% of parents of children between the ages of 3 and 7 buy soft toys at least once every three months.
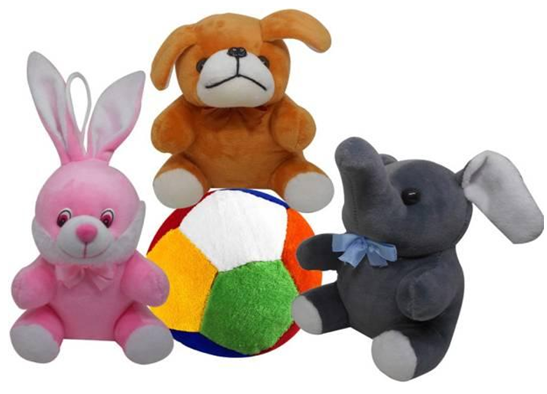
Experts attribute the great popularity of this type of toy to the love of little ones for the soft, comfortable and easy-to-play toys, which are usually animal-shaped, favourite cartoon and television characters or comic book characters, and the fact that it is the safest possible, and a universal, gift that parents and loved ones can give to children.
As parents, we are sure that you also regularly buy plush toys in different shapes for your little ones, but do you know how they are made?
If you are interested in finding out a little more about the classic soft toy manufacturing process, stay with us because we will tell you…
How are toys made?
As consumers, you go to the toy store or go to the online store, browse and select the toy that your child wants or that you think will be interesting and fun. As consumers, you probably don't even think about what kind of manufacturing process the toys go through to reach the store shelf so you can buy them for your little one.
Well, ladies and gentlemen, the truth is that it takes a lot of work and a great deal of love to produce beautiful and completely safe soft toys.
Basic processes in the manufacture of soft toys
Market research
In order for a product to succeed, it must be able to respond to the demands and wishes of consumers. That is why the manufacturers of soft toys pay special attention to the interests of children, analyse the competition, and examine the attitudes of parents. This way, they collect useful information, which makes it easier to find out which toys will please kids from different age groups.
Concept and design
After careful study of the market comes the clarification of the concept. Creating a toy model concept involves creative steps that offer different design solutions. Usually, when developing a toy model, several different concepts are offered, of which at the end of the discussion, one design is approved to be worked on.
Prototyping
Once the design is approved, manufacturers will proceed to prototype the toy to see in practice whether the model will look as good as it looked on paper. Prototyping can be done in different ways, but in recent years, large toy manufacturers have preferred to use 3D printing, as it gives the best possible idea of what the toy would look like. Manufacturers of designer toys, however, prefer the classic methods and make the prototype of the toy manually.
Sewing
Sewing toys involves several steps:
Cutting
The first stage in sewing toys begins with cutting out the raw material and giving it the desired shape of the toy. Cutting is done on automated machines by using a template.
Sewing
Once the patterns are cut and ready for the next stage, they are transferred to the sewing department, where the individual components of the toy are sewn. Sewing is done by professional seamstresses who pay special attention to each stitch, as they are aware that the product is intended for the smallest consumers.
Filling
The third stage in the production of soft toys is stuffing. The materials used for stuffing are synthetic materials, cotton, holofiber, and more. Filling is done with the help of specialized automated machines.
Final sewing
This process is performed by professional tailors with extensive experience. The final sewing of the toys can be done by machine or by hand, depending on whether the toys that are produced are for mass production (in large quantities) or for designer (boutique production).
Adding accessories
To make a toy attractive, it must be fitted with various accessories such as eyes, nose, ribbons, etc. The accessories that are attached to the toy must be fixed very tightly and have tensile strength. (For example, eyes and nose should be able to withstand a force of 21LBS, ribbons, flowers and other accessories should be able to withstand a force of 41LBS, etc. )
Quality control
Toys are subjected to various tests and quality controls before being packaged. Each toy passes through the hands of controllers and if any defective ones are removed.
CE labelling and marking
To be marketed within the EU, plush toys must pass three tests EN 71: EN 71-1 (physical test), EN 71-2 (fire resistance test), EN 71-3 (heavy metal test) ). After passing all the tests successfully, the toys receive the CE marking, which indicates that all European safety, health, and environmental standards are met in the manufacture of plush toys.
Toy packaging
Finally, fully finished toys are carefully packaged, with the manufacturer's CE marking, the manufacturer's name, and the age of children the toys are intended for.
Advertising and sales
Although this stage seems relatively easy, it is in fact a big responsibility, as it is not enough to simply manufacture toys but they must also be promoted in order to attract the interest of both retailers, children, and their parents. In order to reach and become more desirable to children, advertising departments work hard for months before the toys are actually released in the market.
These are the main production stages that the toys go through before being shipped to your favourite store from where to buy them for your little ones.
And what if you decided to make some of the toys yourself? Is that possible?
Of course! If you are creative and want to make a toy for your child yourself, we will give you some ideas that you can work on during your free time at home.
How to make toys at home?
To sew a toy yourself, you will need basic sewing skills, a sewing machine, the right materials, and some of your time.
Toy Ideas
Funny bear
● Go online and find the most common teddy bear pattern. It won't take you long to find it, as there are many websites that offer all kinds of soft toy templates.
● Remove the template and plot it on paper to scale it as you wish.
● Cut out the shape of the bear and you will have a completely ready template to work on.
● Choose the material from which you will sew the bear and unfold it. Then insert the pattern and leave a small margin (1-2 cm). With a sewing chalk, outline the shape of the bear.
● Cut the fabric according to the shape you outlined.
● Use a simple straight stitch to sew the bear. Remember to leave a small opening through which to fill the toy.
● After sewing and shaping the toy, fill it with pre-filled stuffing. Be sure to distribute it evenly throughout the toy.,
● Now you just have to completely close the toy and add the accessories. You can glue eyes, nose and mouth, buttons, ribbons, flowers and other accessories that will make your toy a teddy bear that is attractive to your child.

Textile bird
Birds are much liked by little kids, and if your child also likes toys, you can roll up your sleeves and sew not one but several birds in different colours and sizes. To sew this toy you will need: a pattern, a sewing machine, several different pieces of fabric, a filler, and two black buttons for eyes.
● Start with the template first. If you are not looking for a special template, you can simply draw the bird from your child's favourite children's book. Just make sure to increase the size of the template to the desired size of the toy.
● Put the pattern on the fabric, outline the shape of the bird, and cut it.
● Sew the fabric by leaving a small opening at the bottom to insert the stuffing of the toy.
● Fill the toy with stuffing and sew it completely.
● From another piece of cloth, cut the wings, beak, and feet of the bird. Fill it with a little stuffing and sew it on the toy. You can either sew the wings and feet after filling them or sew it straight without any filling.
● Sew the bird's eye buttons and you are completely finished with the toy.
SpongeBob
SpongeBob SquarePants is one of your favourite toys and you can make it yourself if you have the desire and some free time.
To make it, you will need a piece of yellow cloth, a sewing machine, two straws for hands and feet, a simple household stuffing sponge and several other different colours of fabric for SpongeBob's pants, eyes, and shoes.
● From the yellow piece of fabric, shape the "toy body", insert the household sponge to fill it, and sew the fabric well. Cut the straws in half and wrap each half with a piece of cloth that you can glue directly on.
● Attach arms and legs to the body of the toy.
● Sew on the bottom of the SpongeBob pants.
● Design a shoe template from a separate piece of fabric, sew it, and fill it with stuffing. Then glue them to SpongeBob's "legs".
● Attach other accessories to the toy. Cut goggles, mouth, and glue them. Use buttons for eyes and stick them on too.
Fantastic animal
This is probably the easiest sewing toy, because to make it you just need your imagination. Such toys can be made from literally anything—from an old sock, pillow, old piece of flannel, etc. It is enough to give some shape to the toy, stick eyes on it, decorate it a little, and you will have a completely original soft, plush toy that your child will adore.